• We have updated to the newest version of the forum. Please let us know if you see any issues. And, yes, we know the shoutbox is gone. We'll see about getting it back if they make a newer version.

Jay's MSP (aka Project Not-A-Subaru, aka Project Slotege, aka IDK...)

dmention7

Hater
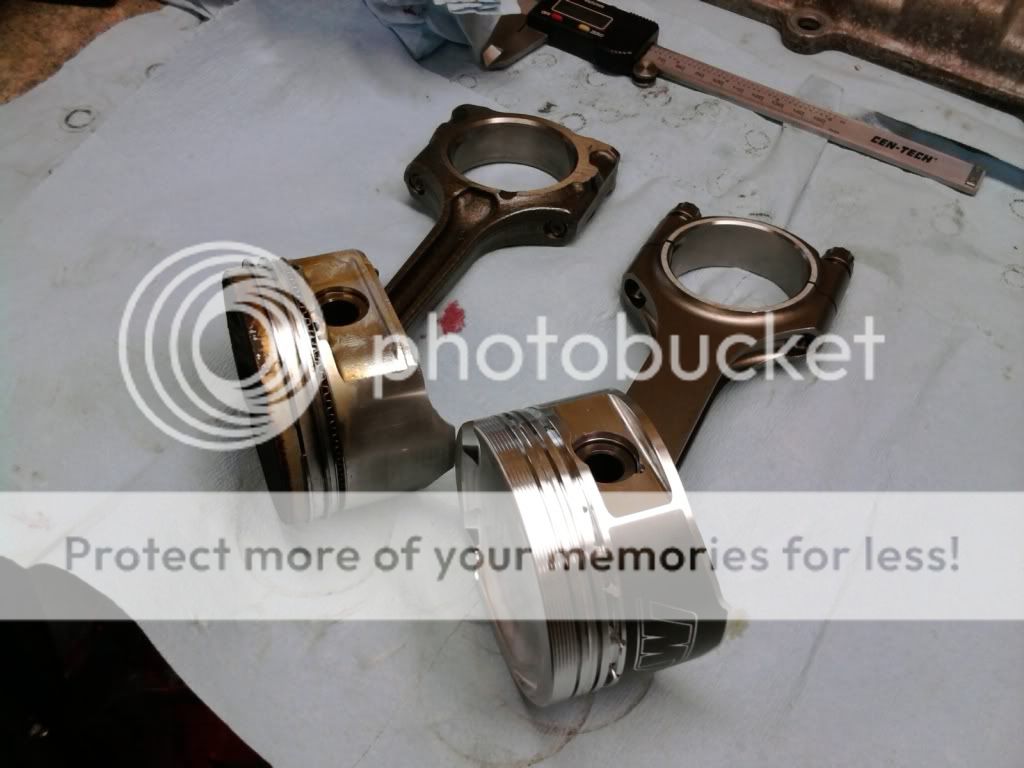
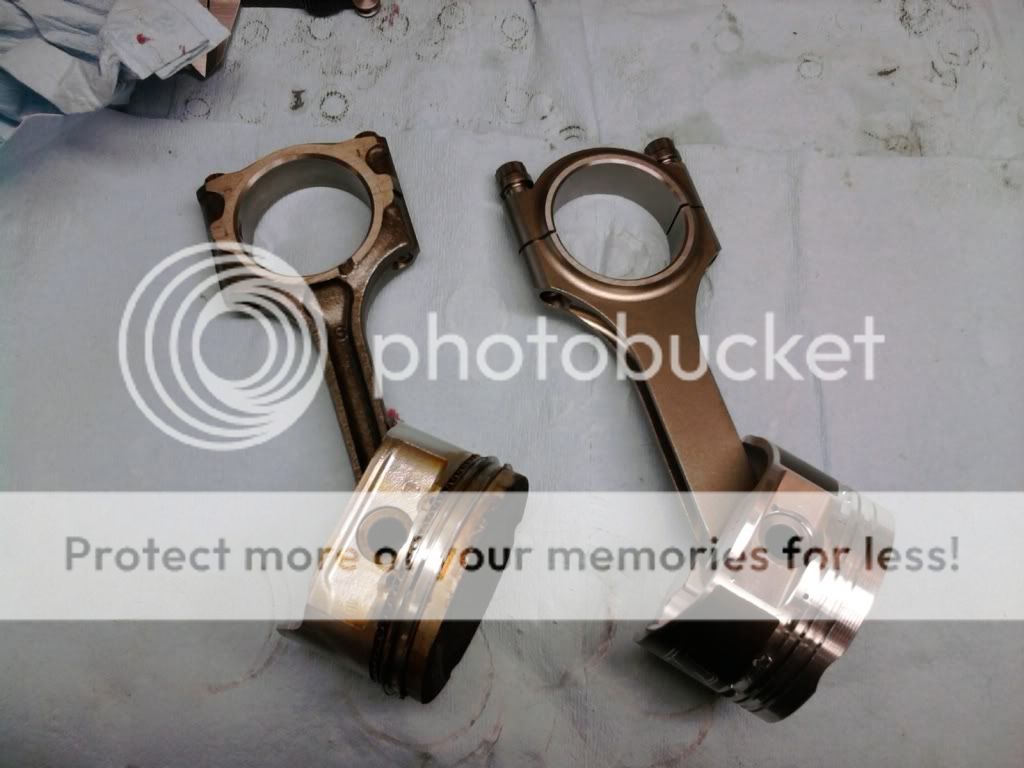
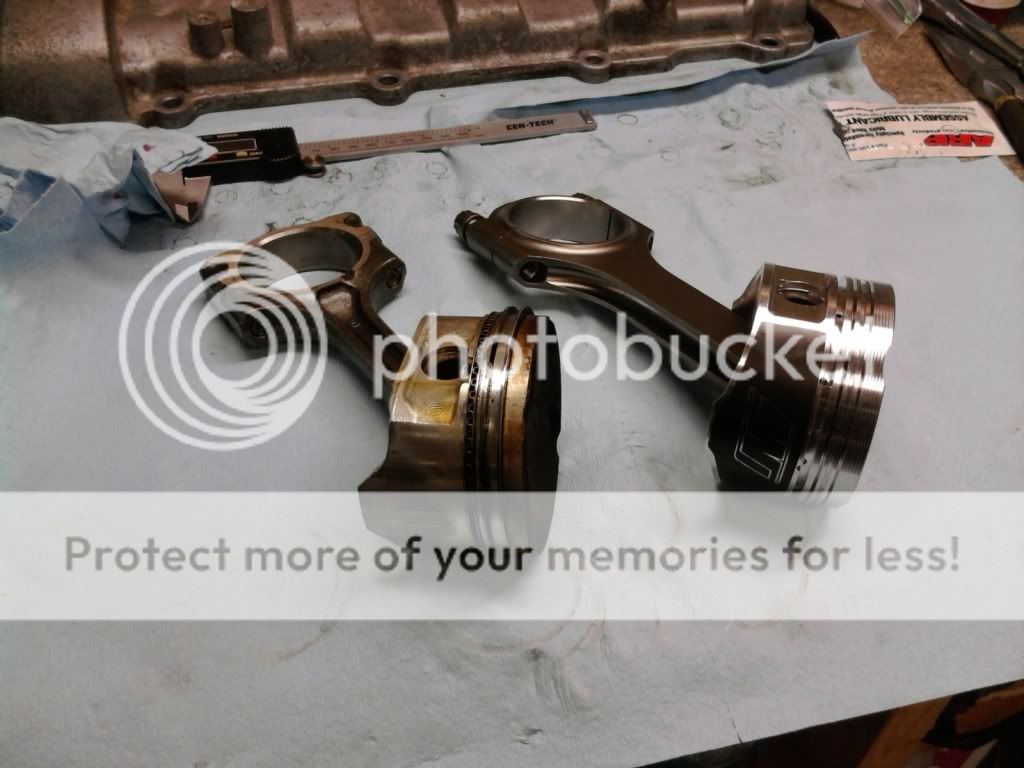
So, I picked up an inexpensive micrometer set and telescoping bore gauge set today. I know that the telescoping gauges aren't the best tools in the world, but after a little bit of playing around I'm pretty confident I was able to use it consistently and pretty accurately. Just in case, I took three independant measurements on everything (the nerd/engineer side of me was tempted to do a gage R&R study on the setup, but the rest of me decided it was necessary... haha)

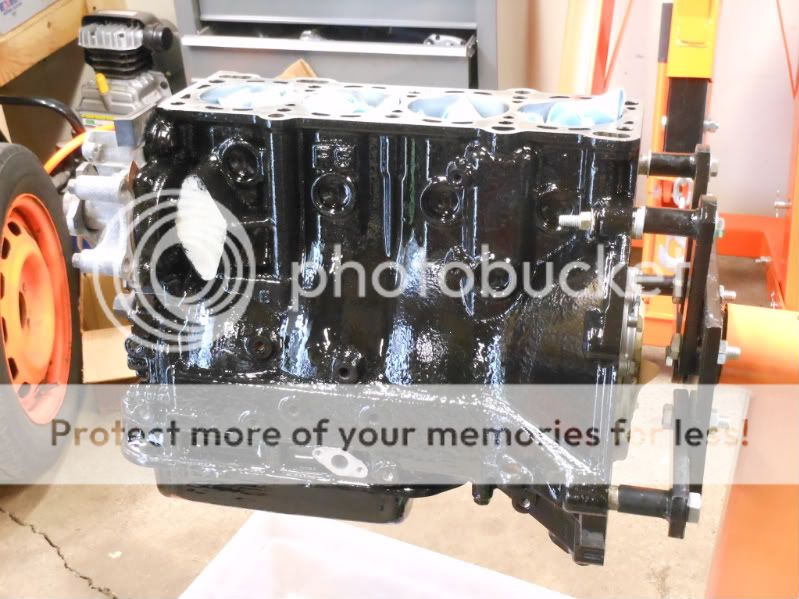
So, anyhow, the piston wall clearances were dead-on with the specs for the pistons (machine shop had the spec sheet). However, I'm measuring the main bearing clearances at .0030-.0035", where the shop manual lists a range of .0009-.0022". I guess I'm not really 100% sure how big of a deal that extra .001" is. The general sense I'm getting from what I've read is that high performance motors and motors that will see abuse are clearanced towards the large end, and that the primary motivation for tighter clearances is to run lighter weight oils for fuel economy. I'll probably get more specific response over on ye olde mazda forum, but I thought I'd see if anyone here has anything to say... basically do I roll with it, or bring it back to the machine shop and have them check my measurements?

EDIT: I guess I should point out that the .0009-.0022" range is from the shop manual for the N/A FS motor. I have not been able to verify yet if there is a different set of clearances for the turbo FS.
 
Last edited:

Big Nate

Chaos Engineer
Jay the engineer side of you should have looked at that as they over did it by 50%. That seems a bit excessive to me. Also if they missed your request by that much that could be enough to warrant at the very least an explanation from them.

Also who are you measuring this clearance? I have heavy XP with measurement and all things like so if you want me to stop over and run though your math and or technique I can do this.
 

dmention7

Hater
There won't be a different set of clearances for the turbo FS because it's the same motor. :)
Right, same motor, but totally different set of operating conditions... seems at least possible to me that mazda would tweak some of the specs accordingly.

Jay the engineer side of you should have looked at that as they over did it by 50%. That seems a bit excessive to me. Also if they missed your request by that much that could be enough to warrant at the very least an explanation from them.

Also who are you measuring this clearance? I have heavy XP with measurement and all things like so if you want me to stop over and run though your math and or technique I can do this.
Well the one thing I knew was important was to use the same actual measuring gauge for both the journal diameter and the bore diameter. The preferred method I have read is to use a micrometer to get the journal diameter, then zero a dial bore gauge in the mic opening, and finally measure the bore with the bore gauge... the reading being the difference between the two, or the clearance. I was able to find a micrometer set for much cheaper than a dial bore gauge, so I did it the opposite... measured the journal with the micrometer, then used a telescoping bore gauge to the ID of the bore, measured that with the same micrometer, and then subtracted to get the clearance. FWIW, I took 3 independent measurements of each bore and each journal, and replicated the measurement with a digital caliper and got nearly identical measurements so I am fairly confident that my measurements are good, even though I'm using inexpensive equipment.

Just to throw a little kink in things, I removed the bearings from one bore, retorqued everything, and measured the bore diameter right on the nuts with what the bearing mfg specifies. So before I get myself too whipped up, I think I'm going to take it all apart, reseat the bearings, and measure again.
 

dmention7

Hater
Well, I feel better. All 5 main bores measured dead on with the specs. Subtracting the bearing wall thicknesses puts me right in the meat of the shop manual's specified clearance. I guess I'll see what happens when I reinstall the bearings.
 

concealer404

Skanky Escorts LLC
Right, same motor, but totally different set of operating conditions... seems at least possible to me that mazda would tweak some of the specs accordingly.
I'm 99.99% sure that they didn't. If they were tweaking, you'd think they would have done quite a few other things more important that would have prevented the motor from being a massive failure. :D
 

niterydr

Legendary Status!
Yup! I use it on any gasket on any car, any spot. Works great for: Headgaskets (composite and MLS), Water pump gaskets (paper type), oil pump gaskets (paper type), oil drain gaskets, egr gaskets, throttle body gaskets, essentially anything gasket ;)
 

dmention7

Hater
I heard the exact opposite from an "experienced engine builder" on mazdas247. But I suppose it's more meaningful that you DO use it and DO suggest it, than that someone else doesn't use it and doesn't recommend it--since they presumably have no experience using it. Do you ever find that it makes it significantly more difficult to remove the gasketed parts?


Anywho, I'm finally starting on assembly! Out with the old busted noise and in with the new forged goodness! Just going off the size of the stock rods, I feel pretty lucky I removed them with a wrench instead of through a hole in the block. lol


Protegebuddy

New Member
Subbin way late but this looks like a sweet build, I plan on getting around to doing this eventually one day lol. Any possible way I could check out in person some things?
 

dmention7

Hater
Yeah, definitely. What kinda stuff were you curious about? I just found out when I installed my first two pistons that MAP accidentally ordered me K1's long rods (.085" longer than stock and designed for use with low-comp pistons), so I'm going to be in bare block mode for at least another few days until the correct rods get delivered. :(

To be fair, I saw the part number on the invoice, but didn't put 2 and 2 together to realize it was not the right part until I noticed my pistons sticking up past the block deck....
 

niterydr

Legendary Status!
Sorry Jay didn't see your reply (been very busy). On stronger gaskets (metal/plastic) it isn't that bad to remove, on paper gaskets it really seals it up and will most likely require a razor blade to remove.
 

dmention7

Hater
No worries, I appreciate the advice anytime. And yeah, I'm not too worried about the paper gaskets then. I always have to take a razor blade to the paper/composite ones anyhow.

New CORRECT rods should be here friday sometime, so I'm hoping to have some updates by the end of the weekend :D
 

dmention7

Hater
Well, rotating assembly is clearanced, lubed, and torqued down. The crank spun like butter with the main caps torqued down, and thrust is in spec. I had to file down one of the piston rings a bit, but everything spins and slides nice and quietly with no drama. The oil squirter to piston clearance is a little tighter than I would have expected (~1mm at BDC). But I checked and all the squirters are installed to the proper depth, and I've never heard of a single person ever having issues with the Wiseco pistons in that regard, so I'm just going to roll with it.

Spent a little time cleaning the head (after much frustration with the spring retainers and valve seals). To anyone who remembers this thread: http://www.mnmazda.com/forum/showthread.php?5480-My-baby-is-making-bad-noises-... I found part of the explanation:
http://i696.photobucket.com/albums/vv322/dmention7/MSP Build/DSCN0075.jpg
http://i696.photobucket.com/albums/vv322/dmention7/MSP Build/DSCN0074.jpg

Looks like something made its way into the cylinder and bounced around for awhile before getting spit out. Could also be part of the reason my 2nd turbo pooped out so early. Time to tear apart the intake mani and look for missing screws on one of the flappers. I should also look a little more closely at the stock pistons. I'll probably just bust out the dremel and smooth out the dings in the combustion chamber... NBD
 
Last edited:

dmention7

Hater
Bottom end is assembled and painted.


I used a POR-15 engine paint kit. (http://www.por15.com/ENGINE-PAINTING-KIT/productinfo/EPKA/) All in all, I'd rate the kit a pretty good value... it has everything you need, though you may want to buy better brushes. The primer is designed to paint right over rust, so that's the reason parts of the block look really lumpy. (Part of it is that I can't take photos for shit... it looks nicer in person) The primer went on really nicely and leveled pretty well on smooth areas like the oil pan. My one gripe is that the primer for the black kit is glossy just like the enamel, so it was damn near impossible to tell where you had already laid down the top coat. It was also pretty thick, making it feel more like basting the motor in BBQ sauce than actually painting. As such, some of the brush strokes didn't level out too well, and I left a few runs on the oil pan. They include a jar of solvent for thinning the paint. If I was going to do it again, I would probably thin it out a bit and apply two lighter coats. But oh well... not like you'll really see that shit anyways. I may try to sand out some of the runs and do another coat this week.


Also gave my turbo mani a paint job. I used VHT Flameproof primer and aluminum color topcoat. The paint went on really nicely, so I hope it holds up. A pic before I put it in the oven for the final cure:
 
Top