S
Slim
Guest
How to Paint Calipers with Decals
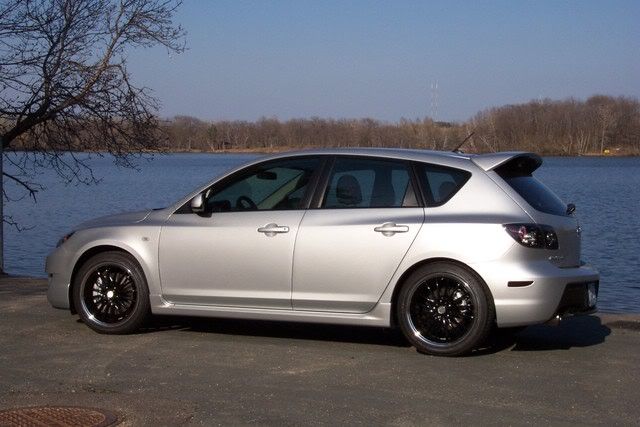
As car guys and gals we inevitably end up purchasing aftermarket rims. And those aftermarket rims often expose more of what’s behind the stock wheels. Namely the brake calipers. No one wants to distract from their pretty new shoes, so those ugly stock calipers could use some dressing up. Time for caliper paint.
The following how-to will guide you through the necessary steps to make your stock calipers look like those fancy Brembos and Wilwoods. So pick a color, follow the step-by-step instructions, and enjoy your new eye candy.
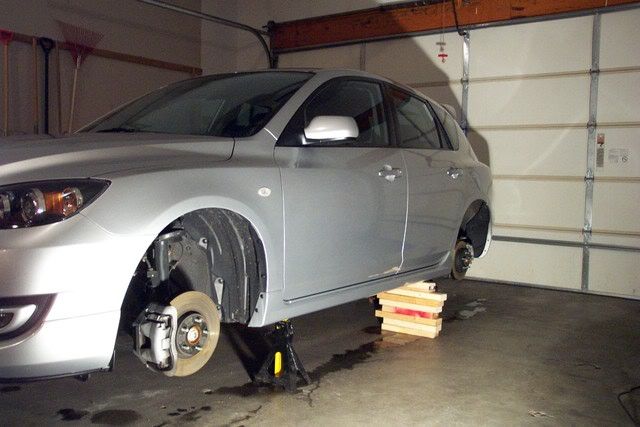
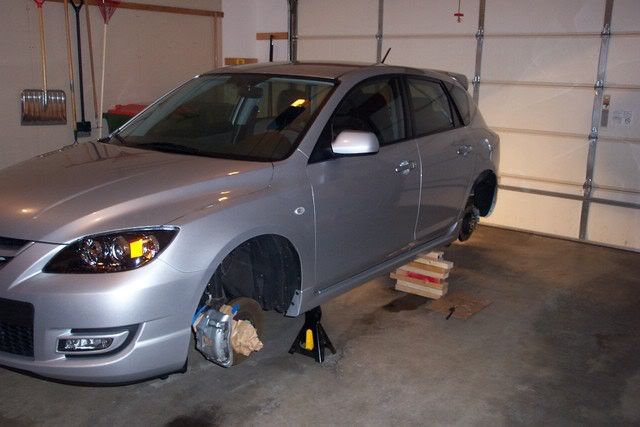
This how-to does not include instructions on jacking up you car. However, in order to paint your calipers you will need to raise your car up on jack stands and remove all 4 wheels. Instructions on how to do this for your specific car can be found in your owner’s manual or more than likely online.
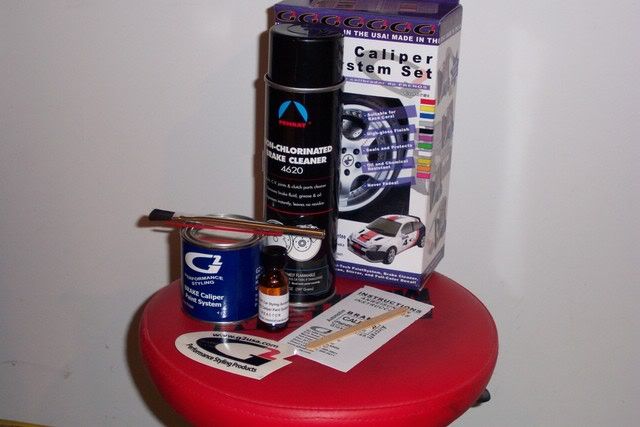
What You Will Need:
Where You Can Get It:
Time: 6-7 hours (not including leaving paint to dry overnight)
1. Get your car up on stands and remove all 4 wheels. G2 caliper paint has a working time of approximately 4 hours so you need to paint all 4 calipers at once.
2. Open your G2 Caliper Paint Kit and examine the contents. Read the instructions for the brake cleaner and caliper paint system so you fully understand how they work.
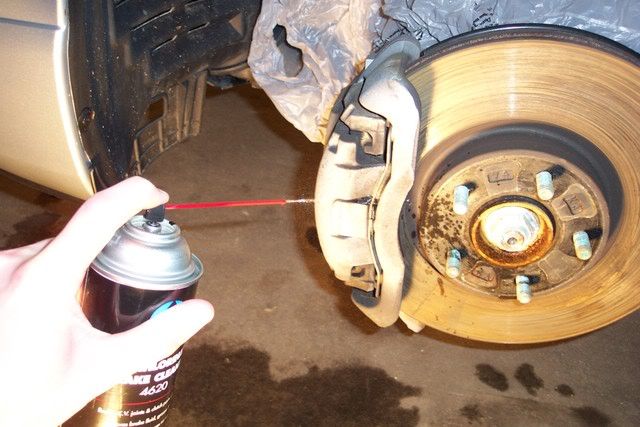
3. Open the brake cleaner and insert the provided red straw into the spray nozzle. This allows you to control where you spray and also creates a more pressurized stream as you spray.
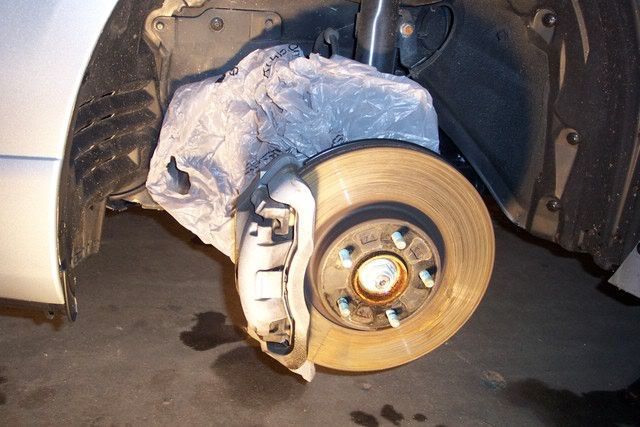
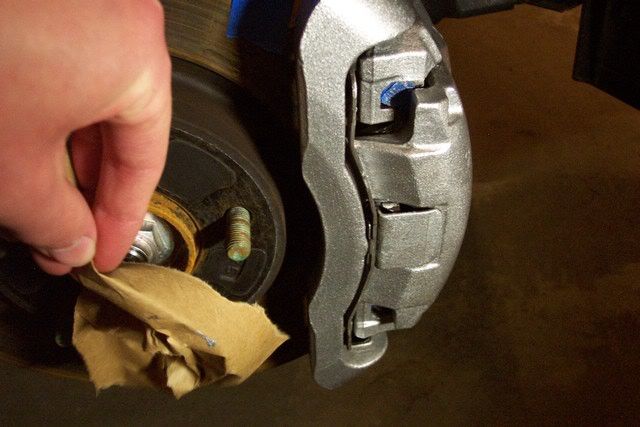
4. Using newspaper or a plastic bag, cover the brake lines and any rubber or plastic parts behind the rotor and caliper to protect them from overspray. Also cover the ground underneath the caliper to catch the brake cleaner as it drips.
5. Spray the calipers liberally with brake cleaner, being sure to cover the whole caliper. The kit provides a large can so be sure to use it. The cleaner the calipers the better the paint will adhere and look in the end. ***Use the brake cleaner in a WELL-VENTILATED AREA to avoid exposure to the fumes.***
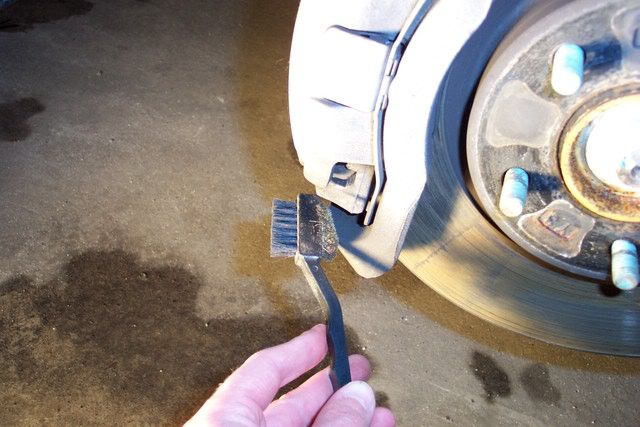
6. If necessary, use a small wire brush to clean brake dust and debris that is stuck on the calipers and spray again with brake cleaner. Then, let the calipers dry for a few minutes.
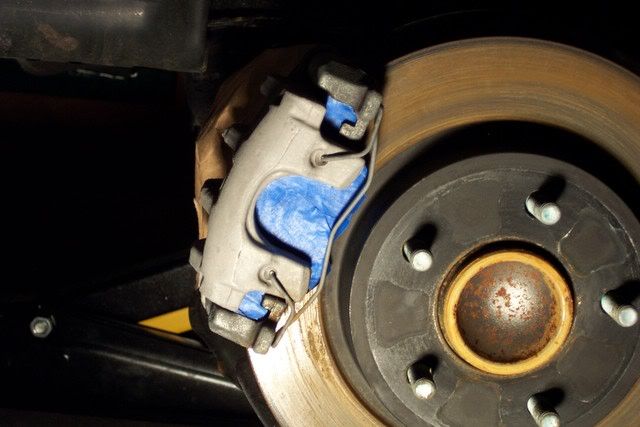
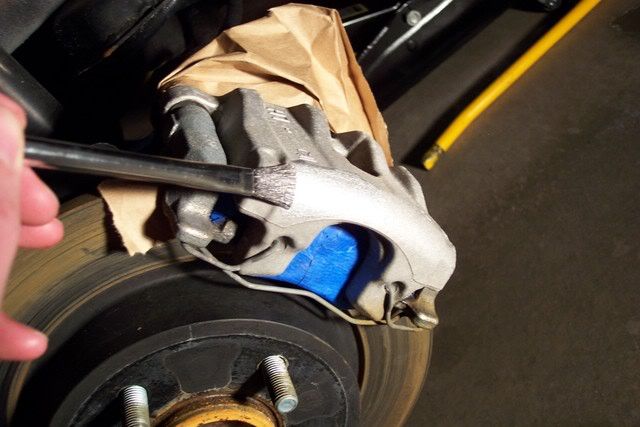
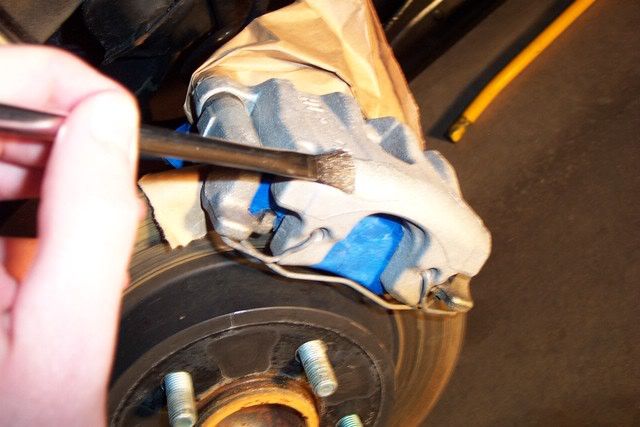
7. After cleaning all 4 calipers, we can begin the paint prepwork. Grab your blue painter’s tape and newspaper or grocery bags and begin to tape off any areas you do not want to paint. It’s up to you what areas of the caliper you want to paint, but be sure to cover any critical brake components that could be damaged or affected by the paint. You WILL NOT want to get paint on any brake lines, pads, or the disc surface of the rotors. When in doubt, don’t paint it and cover it up.
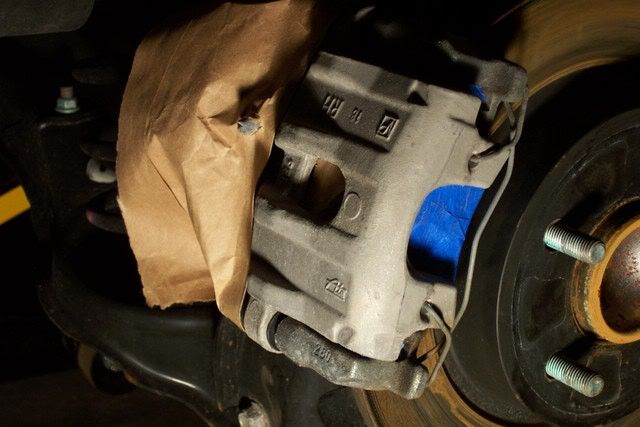
8. I chose to tape off anything that wasn’t a part of the actual metal caliper. It requires getting tape into some tight areas, but it is totally worth it for the end result. And the better job you do at taping, the cleaner it will look when you remove the tape.
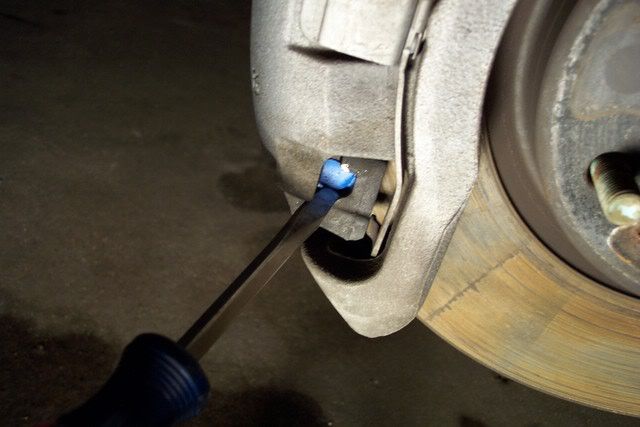
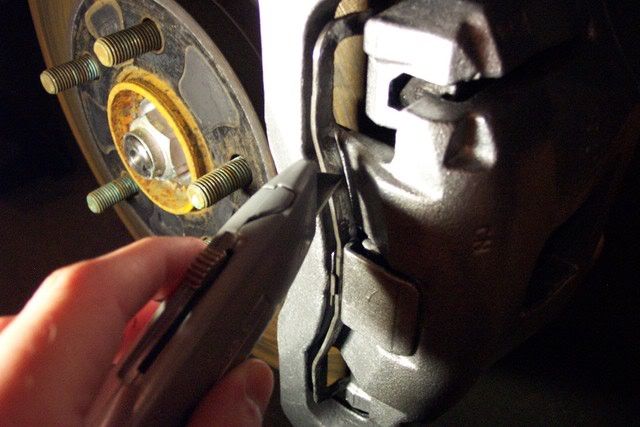
9. If necessary, utilize the screwdriver to get tape into the hard to reach areas. It can be tricky, but do your best as this will make painting much easier.
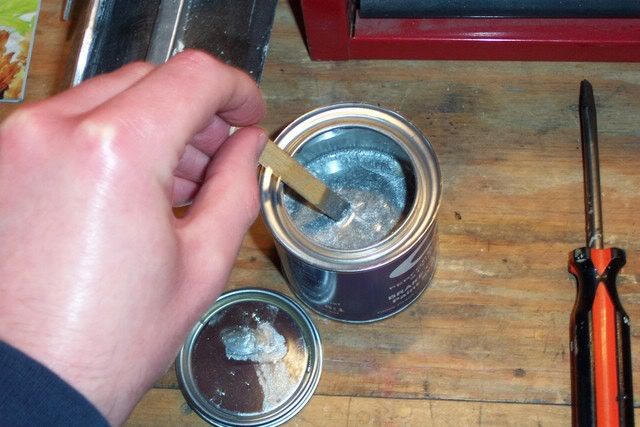
10. With everything cleaned and prepped, you’re ready to paint. The G2 paint is a 2-part system that is mixed to activate the paint. Be sure to READ THE INSTRUCTIONS provided by G2. Open the paint can (use the flathead screwdriver) and then open the bottle of reactor. Be careful opening the bottle not to spill any on your self. (Consult the included instructions for details on the paint and reactor). Pour the entire contents of the reactor into the paint can. ***Make sure to mix and use the paint in a WELL-VENTILATED AREA to avoid exposure to fumes.***

11. Using the provided stir stick, mix the reactor and paint thoroughly. Leave it sit for 5 minutes and then stir the paint again. The paint is now ready to be applied.
12. Grab the provided brush and dip it into the paint. Try to get a small amount onto the brush at a time and apply a thin coat on the caliper. This will help you get a feel for how much paint to apply at a time and avoid drips.
13. Be sure to cover all areas of the caliper including the hard to reach ones. You’ve got a limited time to apply the paint so you cannot really come back later to get spots you missed. Repeat the process for each caliper applying a thin coat each time to avoid dripping. I was able to get 3 coats on each caliper before the paint began to lose its workability and gel a little bit.
14. After completing the painting process, leave the car sit for 24 hours to allow the paint to harden and set. 24 hours is recommended by G2, but I have painted calipers on 2 of my cars now and have only left them sit overnight with no issues. It’s your call.
15. The next day you can return to the car and remove the tape and any other covering.
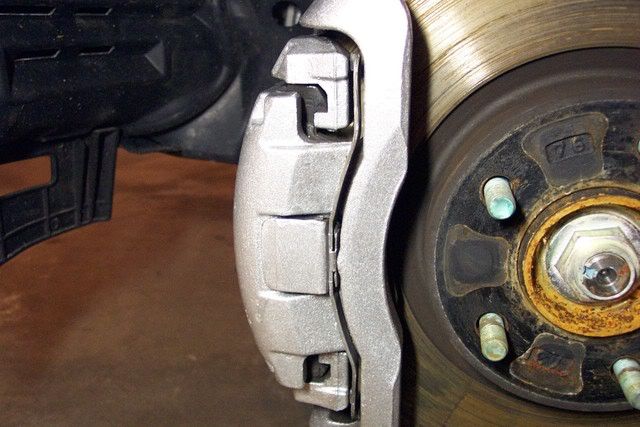
16. After removing all coverings, survey your work and look for any areas that got painted by accident. Use a flathead screwdriver or utility knife to VERY CAREFULLY scrape away excess paint from any areas that you safely can. This will help clean up your work and make your edges look sharper.
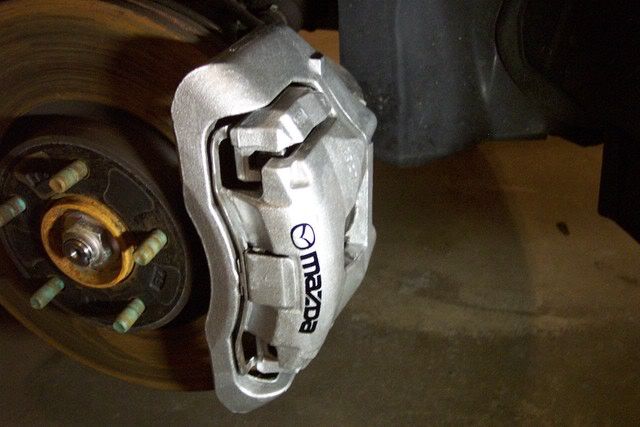
17. Hey, you just painted your calipers. Nice work. You’re finished.
18. Unless…you want to add some decals to complete the custom look. If so, continue on. I recommend reading any instructions that came with your decals, but the following is my guide to installing caliper decals. Grab one of your decals and hold it up to the caliper. Play around with locations and spacing until you find a spot you are happy with.
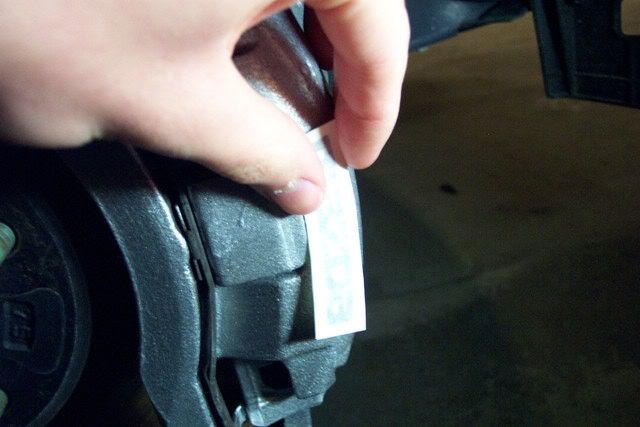
19. Now peel away the backing carefully, holding the outer edge of the thinner top layer of paper with the decals.
20. Take the decal and hold it over the caliper until you find your desired location. Slowly press the decal onto the caliper, starting in the center and working your way outward to both sides. This will help eliminate air bubbles.

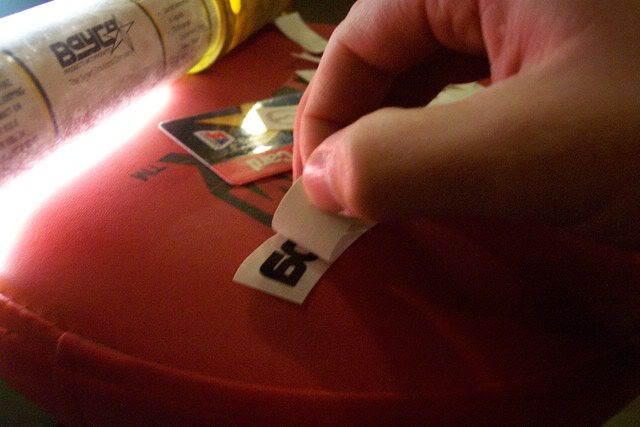
21. With the decal applied, use a credit card or driver’s license to smooth the decal onto the caliper. Again, start in the middle and work your way outward until the decal is flattened to the caliper.
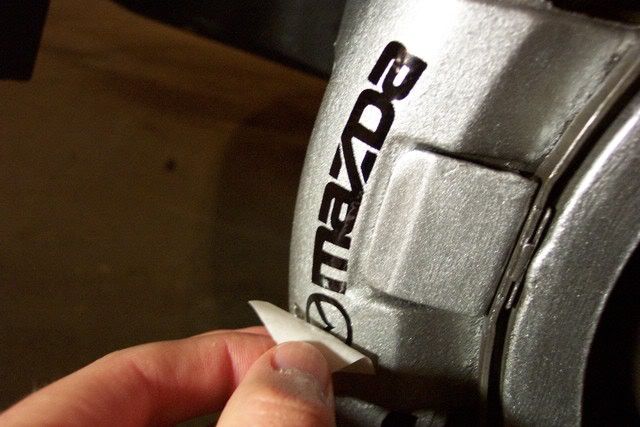
22. Next, slowly peel away the thin paper covering the decals, being sure all edges of the lettering are sticking to the caliper. If an edge pulls up, use the point of the utility knife or some other instrument to push it back down.
23. Complete the same process for the other calipers and you’re done applying the decals.
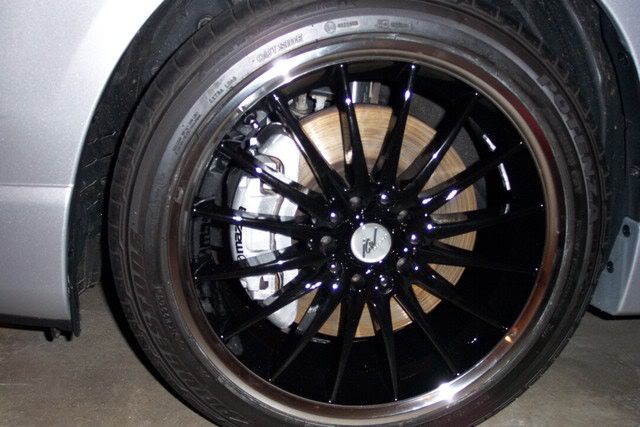
24. Now you can put your wheels back on and take the car off the jack stands. Congratulations! Stand back and appreciate all your hard work.
DISCLAIMER: Slim has provided this guide as a how-to to use at your own risk. I take no responsibility for any damage incurred to property or persons.
As car guys and gals we inevitably end up purchasing aftermarket rims. And those aftermarket rims often expose more of what’s behind the stock wheels. Namely the brake calipers. No one wants to distract from their pretty new shoes, so those ugly stock calipers could use some dressing up. Time for caliper paint.
The following how-to will guide you through the necessary steps to make your stock calipers look like those fancy Brembos and Wilwoods. So pick a color, follow the step-by-step instructions, and enjoy your new eye candy.
This how-to does not include instructions on jacking up you car. However, in order to paint your calipers you will need to raise your car up on jack stands and remove all 4 wheels. Instructions on how to do this for your specific car can be found in your owner’s manual or more than likely online.
What You Will Need:
- G2 Caliper Paint Kit (Includes paint, brush, stir stick, brake cleaner…basically everything you will need) – Approx. $35 shipped
- Blue Painter’s Tape - $2-3
- Newspaper, Grocery Bags, or Plastic Bags
- Small Wire Brush (recommended)
- Flathead Screwdriver (optional)
- Utility Knife (optional)
- Caliper Decals (if desired) - $8.99 shipped (18 decals, 6 each of 3 types)
Where You Can Get It:
- G2 Caliper Paint Kit - Various online retailers. For pictures and information visit www.g2usa.com For purchasing, I recommend www.hubcapsplus.com for great pricing and a coupon code for 5% off can be found on their site.
- Blue Painter’s Tape, Wire Brush, Screwdriver, and Utility Knife can be found at any hardware store like Home Depot or Lowe’s
- Caliper Decals – Various online sellers. The ones I got are truly caliper decals, so they are curved appropriately. Visit www.xenonmods.com if interested.
Time: 6-7 hours (not including leaving paint to dry overnight)
- 2 hours prep time (Jack car on stands, remove wheels, clean, tape)
- 3 hours paint time (15 min x 4 calipers = 1 hour x 3 coats = 3 hours)
- 1-2 hours finishing time (Remove tape, excess paint, add decals, put wheels back on)
1. Get your car up on stands and remove all 4 wheels. G2 caliper paint has a working time of approximately 4 hours so you need to paint all 4 calipers at once.
2. Open your G2 Caliper Paint Kit and examine the contents. Read the instructions for the brake cleaner and caliper paint system so you fully understand how they work.
3. Open the brake cleaner and insert the provided red straw into the spray nozzle. This allows you to control where you spray and also creates a more pressurized stream as you spray.
4. Using newspaper or a plastic bag, cover the brake lines and any rubber or plastic parts behind the rotor and caliper to protect them from overspray. Also cover the ground underneath the caliper to catch the brake cleaner as it drips.
5. Spray the calipers liberally with brake cleaner, being sure to cover the whole caliper. The kit provides a large can so be sure to use it. The cleaner the calipers the better the paint will adhere and look in the end. ***Use the brake cleaner in a WELL-VENTILATED AREA to avoid exposure to the fumes.***
6. If necessary, use a small wire brush to clean brake dust and debris that is stuck on the calipers and spray again with brake cleaner. Then, let the calipers dry for a few minutes.
7. After cleaning all 4 calipers, we can begin the paint prepwork. Grab your blue painter’s tape and newspaper or grocery bags and begin to tape off any areas you do not want to paint. It’s up to you what areas of the caliper you want to paint, but be sure to cover any critical brake components that could be damaged or affected by the paint. You WILL NOT want to get paint on any brake lines, pads, or the disc surface of the rotors. When in doubt, don’t paint it and cover it up.
8. I chose to tape off anything that wasn’t a part of the actual metal caliper. It requires getting tape into some tight areas, but it is totally worth it for the end result. And the better job you do at taping, the cleaner it will look when you remove the tape.
9. If necessary, utilize the screwdriver to get tape into the hard to reach areas. It can be tricky, but do your best as this will make painting much easier.
10. With everything cleaned and prepped, you’re ready to paint. The G2 paint is a 2-part system that is mixed to activate the paint. Be sure to READ THE INSTRUCTIONS provided by G2. Open the paint can (use the flathead screwdriver) and then open the bottle of reactor. Be careful opening the bottle not to spill any on your self. (Consult the included instructions for details on the paint and reactor). Pour the entire contents of the reactor into the paint can. ***Make sure to mix and use the paint in a WELL-VENTILATED AREA to avoid exposure to fumes.***
11. Using the provided stir stick, mix the reactor and paint thoroughly. Leave it sit for 5 minutes and then stir the paint again. The paint is now ready to be applied.
12. Grab the provided brush and dip it into the paint. Try to get a small amount onto the brush at a time and apply a thin coat on the caliper. This will help you get a feel for how much paint to apply at a time and avoid drips.
13. Be sure to cover all areas of the caliper including the hard to reach ones. You’ve got a limited time to apply the paint so you cannot really come back later to get spots you missed. Repeat the process for each caliper applying a thin coat each time to avoid dripping. I was able to get 3 coats on each caliper before the paint began to lose its workability and gel a little bit.
14. After completing the painting process, leave the car sit for 24 hours to allow the paint to harden and set. 24 hours is recommended by G2, but I have painted calipers on 2 of my cars now and have only left them sit overnight with no issues. It’s your call.
15. The next day you can return to the car and remove the tape and any other covering.
16. After removing all coverings, survey your work and look for any areas that got painted by accident. Use a flathead screwdriver or utility knife to VERY CAREFULLY scrape away excess paint from any areas that you safely can. This will help clean up your work and make your edges look sharper.
17. Hey, you just painted your calipers. Nice work. You’re finished.
18. Unless…you want to add some decals to complete the custom look. If so, continue on. I recommend reading any instructions that came with your decals, but the following is my guide to installing caliper decals. Grab one of your decals and hold it up to the caliper. Play around with locations and spacing until you find a spot you are happy with.
19. Now peel away the backing carefully, holding the outer edge of the thinner top layer of paper with the decals.
20. Take the decal and hold it over the caliper until you find your desired location. Slowly press the decal onto the caliper, starting in the center and working your way outward to both sides. This will help eliminate air bubbles.
21. With the decal applied, use a credit card or driver’s license to smooth the decal onto the caliper. Again, start in the middle and work your way outward until the decal is flattened to the caliper.
22. Next, slowly peel away the thin paper covering the decals, being sure all edges of the lettering are sticking to the caliper. If an edge pulls up, use the point of the utility knife or some other instrument to push it back down.
23. Complete the same process for the other calipers and you’re done applying the decals.
24. Now you can put your wheels back on and take the car off the jack stands. Congratulations! Stand back and appreciate all your hard work.
DISCLAIMER: Slim has provided this guide as a how-to to use at your own risk. I take no responsibility for any damage incurred to property or persons.
Last edited by a moderator:
